Friday, September 13, 2013
Formica In Depth surface countertops - review years later
After a few years of having my countertops, I figured I could post a new review on how they held up. They still look new. I haven't had any problems with citris or heat and they scrub up great. Once those micro scratches were in, which weren't horrible to begin with, I haven't seen any additional problems with it. I even had a few pieces cut to make chopping boards. Those, which I cut on, even look great. So, that's my update after daily use for two years. Hope that makes your decision easier if you are contemplating your decision to use Formica for your countertops.
Thursday, May 12, 2011
Front Yard in Progress - The Stone Wall
So, like I said before, my boyfriend has experience from his last job in doing hardscaping. We are working on building this wall, merely for looks. We went to a rock yard, and purchased a pallet of river stone. The cost is by weight, and the first pallet we purchased was $225. The second was $275. Here's the thing, you have to rent a heavy duty truck. We have access to them for free, but you certainly cannot use your car, or even a lightweight truck. Those pallets are usually a ton, literally.
We also got a yard of limestone, which is very heavy too. I think it was less than $50.
We began by laying out all the stone in the yard so we could "see" the different sizes.
For each row, you want to have stone that are the same height.

In progress:

We're hoping to finish the wall in the next couple of weeks. We're also going to add steps to the right of it. We've been having trouble finding the stone we want for the steps. As soon as the month of weddings passes, we will have more time to make some progress.
We also got a yard of limestone, which is very heavy too. I think it was less than $50.
We began by laying out all the stone in the yard so we could "see" the different sizes.
For each row, you want to have stone that are the same height.

They do not have to be the same length. After my boyfriend would lay a row of stone, then I'd come back in with limestone and fill in the back of the wall. I would pat it down with a sledge hammer for harder to get to areas, and a damper for larger spaces. A trick he tought me was using a trowel to pat in the limestone into the pockets of the stone wall. Once limestone complete, the next row could be laid.
In progress:

We're hoping to finish the wall in the next couple of weeks. We're also going to add steps to the right of it. We've been having trouble finding the stone we want for the steps. As soon as the month of weddings passes, we will have more time to make some progress.
Monday, April 18, 2011
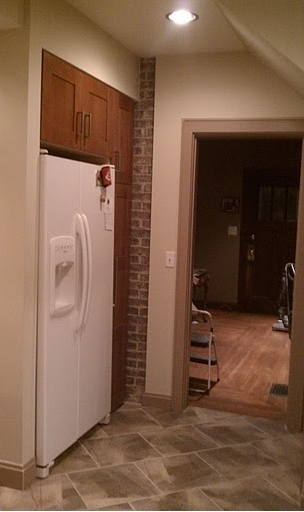
Kitchen Preview
I am working on getting a good before and after post created. However, in the meantime, here are some shots that I took with my phone camera.


 |
| Biltmore Grey Tile |
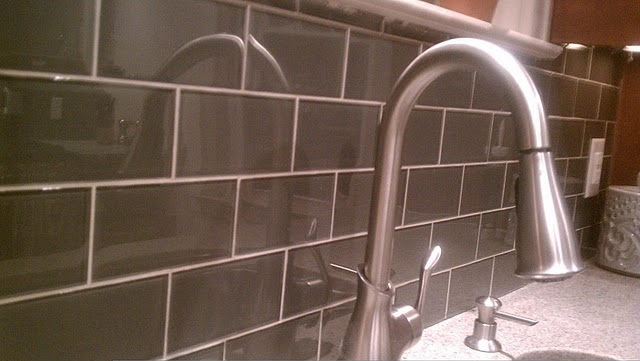 |
| Antique Moss Glass Subway Tile |
 |
| Before Backsplash |
Wednesday, April 13, 2011
Bringing on some curb appeal....before
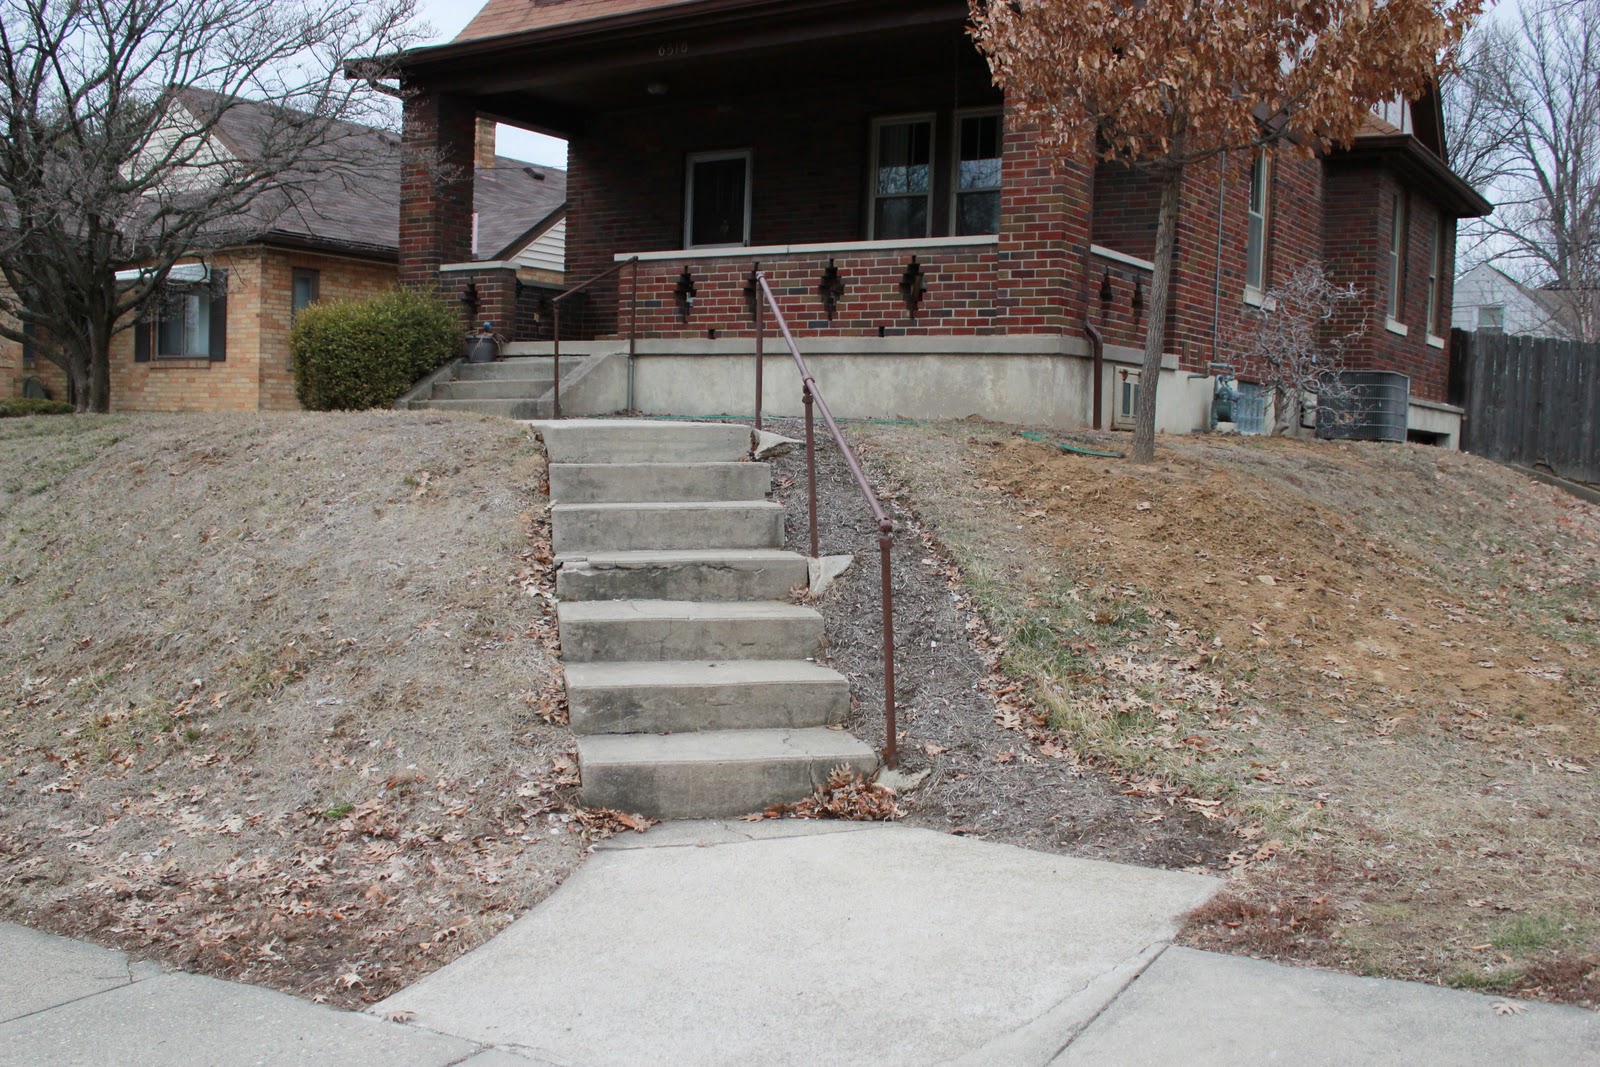
We added the large oak last fall. Which is a great time to buy trees may I add. For two large trees, we got the non-delivered price of $250. They are both over 10 feet tall. We picked out a River Birch for the back, to add privacy. Then a Sawtoothed Oak for the front. We're keeping the nice large Dogwood to the left of the front yard. We've been talking about what we want to do here. Maybe a rock wall around the oak tree. I'd like to replace the concrete steps with large stones. Luckily I have friends and an SO that worked professionally in building hardscapes, so I'll get their expertise and share it here.


See this steep front hill? I cannot mow it myself. Which creates a problem. Plus, it's pretty darn ugly. We're thinking of covering both hill sides with a ground cover. What do you think?
Thursday, March 17, 2011
Whirlpool Quiet Series Dishwashers
I have purchased two dishwashers in my lifetime. Both have been Whirlpool Quiet Series dishwashers. Let me tell you why.
First, when I started looking for my first dishwasher, I didn't want to spend a lot of money. Luckily at that time I was looking for a white dishwasher to match my other white appliances. I bought a month's worth of access to consumer reports. Their "best buy" suggestion at that time was the Whirlpool Quiet Series. So, I found one at Sears for $425.
I began using it, and LOVED it. I had only used one dishwasher prior, one that came with my house. It was awful. So, I only had that to compare to, but still, this thing was great. I noticed I could consistantly use the "light" wash option, and my dishes still came out clean without rinsing. What I really grew to love was the cutlery holder that fit in the door. This is handy as when you just want to throw in a fork, you don't have to open the door all the way, to pull out the racks. You just slightly open the door and slide your fork in the slot.
When I moved into my boyfriends house, he too had an old dishwasher. This required me to rinse my dishes before putting them in the dishwasher, and, and!, this is when it became really apparant how handy that cutlery door thing was.
Well, I found out that Whirlpool has a copyright on that handy cutlery in the door thingy-ma-jig. So, I knew that my next dishwasher would also be a Whirlpool. I did however double check consumer reports again, and still, they had great reviews for the thing. I got the stainless steal this time, and the quiet rating is better. It is VERY quiet. What's great, is now the new ones have the 30 minute express glass cycle. This my friends is awesome. This means that if you should have two loads of dishes (dinner party tonight?), then you can put the first load in, and by the time all the guests leave after dinner, you are ready for the final load. No more waking up to a dirty kitchen the next day because you had to wait on your dishwasher cycle.
Now that I sound like a Whirlpool spokesperson, let me tell you, I'm not. I'll tell you how much I love my GE Profile Oven too. That's a different post though.
Anyhow, feel confident in the Whirlpool dishwasher buying process that you will get a dishwasher that cleans, and makes your life better. At least it did mine anyway.
Here's a picture of mine with the protective seal still on it.

Thursday, March 10, 2011
Formica In Depth Surfacing
We went with Formica In depth surfacing. It's like Corian, but a different brand obviously.
Cons:
It's not very heat resistant. The manufacture recommends using trivits.
Scratches easily.
Pros:
Do not have to seal it
Can sand out scratches with standard sand paper (or even bad stains)
So far, that's what I know about it. I haven't really used it, so I cannot tell you yet if I love it or not.
The color we ended up going with was the River Rock Mosaic.


Bar stools - Man, am I picky
I finally (hopefully) found bar stools. I've been keeping my eyes out for weeks knowing that the day would come that the kitchen would be ready, but we wouldn't have anywhere to sit at the new bar.
I've looked online at various stores. You know the norm, Pottery Barn, Ethan Allen, Arhaus etc. Though I have found some that I have liked (namely at Arhaus), I didn't want to take out a second mortgage for stools.
Surprisingly, I've had good luck with online items at Target. I once bought a pleather ottomon from there that looks just like Pottery Barns, if not better. I paid only $200 for it, and three years later still looks great. Anywho, I digress. I also checked out Craigslist, and surprise, surprise, people wanted way too much for their way out of date items.
So, I headed over to Target.com and found this:

It has great reviews. I like it, the man likes it. Price wasn't great, but I got free shipping. I ordered the taller 30" for $169 a piece. I could have kept looking for something I liked for cheaper, but in the end I would have spent hours and hours to save a little. I thought my time was a little more valuable.
Tuesday, March 1, 2011
Ikea Cabinets - What to expect and tips.
When I first start researching Ikea cabinets, I spent hours on ikeafans.com and still was confused. So, now that I've been there done that, let me list some things you should keep in mind.
-If you haven't torn out the walls and expect to, wait to finalize your order once you have put up the dry wall.
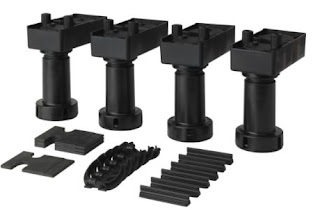
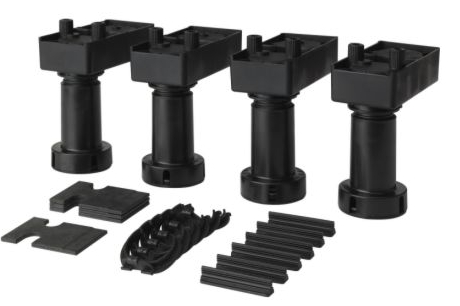
-Add the legs in your measurements for the base cabinets. An 88" pantry cabinet is not 88" inches tall once you add the 4" of legs. The legs are adjustable, but are at minumum 3 7/8".
 -The 39" inch wall cabinets are not really 39" inches. They are 39 x/x" (I think 7/8" but I cannot remember now) and then if you add the trim pieces on top and below, you add another 3" or so. So, make sure to take this into consideration if you are building soffits or have low ceilings. Double check the actual sizes of the cabinets, trim and legs.
-Build the cabinets first, then open up the doors and drawers. If you bought the wrong cabinet, you can still return the doors and drawers since you haven't opened them yet. This is where all of your money went anyways. The cabinets themselves are cheap.
-Some Ikea's will allow you to return built cabinets. Don't take them apart once built. Then they are unstable and they won't buy them back. I believe they must use them in their displays if they are well built. The kitchen people upstairs don't know this. They are led to believe that once opened, there are no returns. Not always so, and not just my experience either. Again, you really don't get much money back because the cabinets themselves are inexpensive. The doors and drawers, the doors and drawers people. Remember that, say it, and take it to heart.
-If you want to do your kitchen on a strict budget, remember to think about the cost of the doors and drawers. If you want a cabinet that has 1 door, it will be cheaper than if you make it a two door cabinet.
-There are only two cabinet styles. Light birch and white. The doors and drawer fronts cover up the color of those cabinets if you go with a different door style besides birch or white. Then, for exposed sides (like the last cabinet on the island), you buy a cover panel to match the doors you chose. If you don't want this two toned look which you can notice when you open the doors, then go with doors that are either white or the light birch color.
 -Don't pay someone to assemble your cabinets. They are easy to do. I assembled them myself while my boyfriend and his dad worked on the soffits. I'm weak, but I can read instructions and you can too. However, the large pantry cabinets do take two people due to the size.
-Don't worry about not having enough parts. In all the cabinets and boxes I opened, I never once had missing parts. If you do have missing parts, start looking in other boxes to the cabinets. For instance, you may find that once you have the cabinet together, the instructions for the cabinets have you putting in the brackets for the drawers. The brackets for the drawers are in the drawer box. Not the cabinet box.
-If you start having issues putting something together, its you not them. In other words, if you have to struggle with getting something to fit when you are putting the cabinets or drawers together, you've likely made a mistake. Everything fits together really well, and doesn't take much elbow greese to fit. Take a step back, make sure you read the pictorial only instructions, and double check your assembly.
-Have a drawer party. Once you put one or two drawers together, it's pretty easy. When you start looking at the 45 boxes of drawers though, it's pretty daunting. Buy some wine, have friends over, and put together the drawers. I got this idea from an Ikea kitchen designer, and I wish I were given that advice when I was depressingly putting my drawers together. It's something you can do while chatting and drinking and makes the pain go away.
-When you make the order in the kitchen design area, they will give you an order sheet. You take this down to the customer service area near the registers. Give them the order sheet and a copy of your receipt (it's best to just buy upstairs instead of waiting through the normal lines for registers). They will go get all the boxes for you. You don't have to yourself.
-They actually have everything in stock. When we first went there were expecting to order our cabinets, and then pick them up a week later or so. Well, to our surprise, they had everything in stock. Luckily we brought our Toyota SUV, so we were able to (barely) fit our entire kitchen in the back. Thank god that thing has a back window that can be rolled down. We would have never been able to get the 88" cabinet box in.
-Don't watch the video they gave you when you get your cabinets. It will make you irate after watching a couple easily assemble, hang and enjoy their new kitchen in what seems like 15 minutes. This isn't happening. There is really no point in watching it.
-If you haven't torn out the walls and expect to, wait to finalize your order once you have put up the dry wall.
-Add the legs in your measurements for the base cabinets. An 88" pantry cabinet is not 88" inches tall once you add the 4" of legs. The legs are adjustable, but are at minumum 3 7/8".
-Build the cabinets first, then open up the doors and drawers. If you bought the wrong cabinet, you can still return the doors and drawers since you haven't opened them yet. This is where all of your money went anyways. The cabinets themselves are cheap.
-Some Ikea's will allow you to return built cabinets. Don't take them apart once built. Then they are unstable and they won't buy them back. I believe they must use them in their displays if they are well built. The kitchen people upstairs don't know this. They are led to believe that once opened, there are no returns. Not always so, and not just my experience either. Again, you really don't get much money back because the cabinets themselves are inexpensive. The doors and drawers, the doors and drawers people. Remember that, say it, and take it to heart.
-If you want to do your kitchen on a strict budget, remember to think about the cost of the doors and drawers. If you want a cabinet that has 1 door, it will be cheaper than if you make it a two door cabinet.
-There are only two cabinet styles. Light birch and white. The doors and drawer fronts cover up the color of those cabinets if you go with a different door style besides birch or white. Then, for exposed sides (like the last cabinet on the island), you buy a cover panel to match the doors you chose. If you don't want this two toned look which you can notice when you open the doors, then go with doors that are either white or the light birch color.
-Don't worry about not having enough parts. In all the cabinets and boxes I opened, I never once had missing parts. If you do have missing parts, start looking in other boxes to the cabinets. For instance, you may find that once you have the cabinet together, the instructions for the cabinets have you putting in the brackets for the drawers. The brackets for the drawers are in the drawer box. Not the cabinet box.
-If you start having issues putting something together, its you not them. In other words, if you have to struggle with getting something to fit when you are putting the cabinets or drawers together, you've likely made a mistake. Everything fits together really well, and doesn't take much elbow greese to fit. Take a step back, make sure you read the pictorial only instructions, and double check your assembly.
-Have a drawer party. Once you put one or two drawers together, it's pretty easy. When you start looking at the 45 boxes of drawers though, it's pretty daunting. Buy some wine, have friends over, and put together the drawers. I got this idea from an Ikea kitchen designer, and I wish I were given that advice when I was depressingly putting my drawers together. It's something you can do while chatting and drinking and makes the pain go away.
-When you make the order in the kitchen design area, they will give you an order sheet. You take this down to the customer service area near the registers. Give them the order sheet and a copy of your receipt (it's best to just buy upstairs instead of waiting through the normal lines for registers). They will go get all the boxes for you. You don't have to yourself.
-They actually have everything in stock. When we first went there were expecting to order our cabinets, and then pick them up a week later or so. Well, to our surprise, they had everything in stock. Luckily we brought our Toyota SUV, so we were able to (barely) fit our entire kitchen in the back. Thank god that thing has a back window that can be rolled down. We would have never been able to get the 88" cabinet box in.
-Don't watch the video they gave you when you get your cabinets. It will make you irate after watching a couple easily assemble, hang and enjoy their new kitchen in what seems like 15 minutes. This isn't happening. There is really no point in watching it.
Kitchen Remodel - Sink
I knew I was going with stainless steel. You can put a hot pan it, you can scrub it, and it looks great after years of use. There was already a stainless steel sink in the kitchen, but I didn't want that either. It was a lower quality SS, and it was a double sink. I think double sinks are great if you don't have a dishwasher. However, when you have dishwasher, it's really just two sinks to clean every day. So, I wanted one sink and one sink only.
I also knew I wanted an undermount sink. I think they look so much cleaner in the kitchen. So, I went on my hunt. The big box stores had some on display, but the higher quality SS sinks they had were over $500. Ouch. I believe it was on the home and garden forum someone reminded me to go to overstock.com. Wow, is this the place to go for a sink!
Just a quick note, when you start looking at stainless steel sinks, sometimes they'll list the guage. The lower the number the better. It took me forever to research that. I couldn't figure out why a 16 guage SS sink was more expensive. I always seem to think the larger the number the bigger, but not here apparently.
I ended up with a 16 guage Kraus undermounted sink. It's quite beautiful. You know what else is beautiful? A $200 price tag delivered to my door.
Check it.

http://www.kraususa.com/
I also knew I wanted an undermount sink. I think they look so much cleaner in the kitchen. So, I went on my hunt. The big box stores had some on display, but the higher quality SS sinks they had were over $500. Ouch. I believe it was on the home and garden forum someone reminded me to go to overstock.com. Wow, is this the place to go for a sink!
Just a quick note, when you start looking at stainless steel sinks, sometimes they'll list the guage. The lower the number the better. It took me forever to research that. I couldn't figure out why a 16 guage SS sink was more expensive. I always seem to think the larger the number the bigger, but not here apparently.
I ended up with a 16 guage Kraus undermounted sink. It's quite beautiful. You know what else is beautiful? A $200 price tag delivered to my door.
Check it.
http://www.kraususa.com/
Subscribe to:
Posts (Atom)